
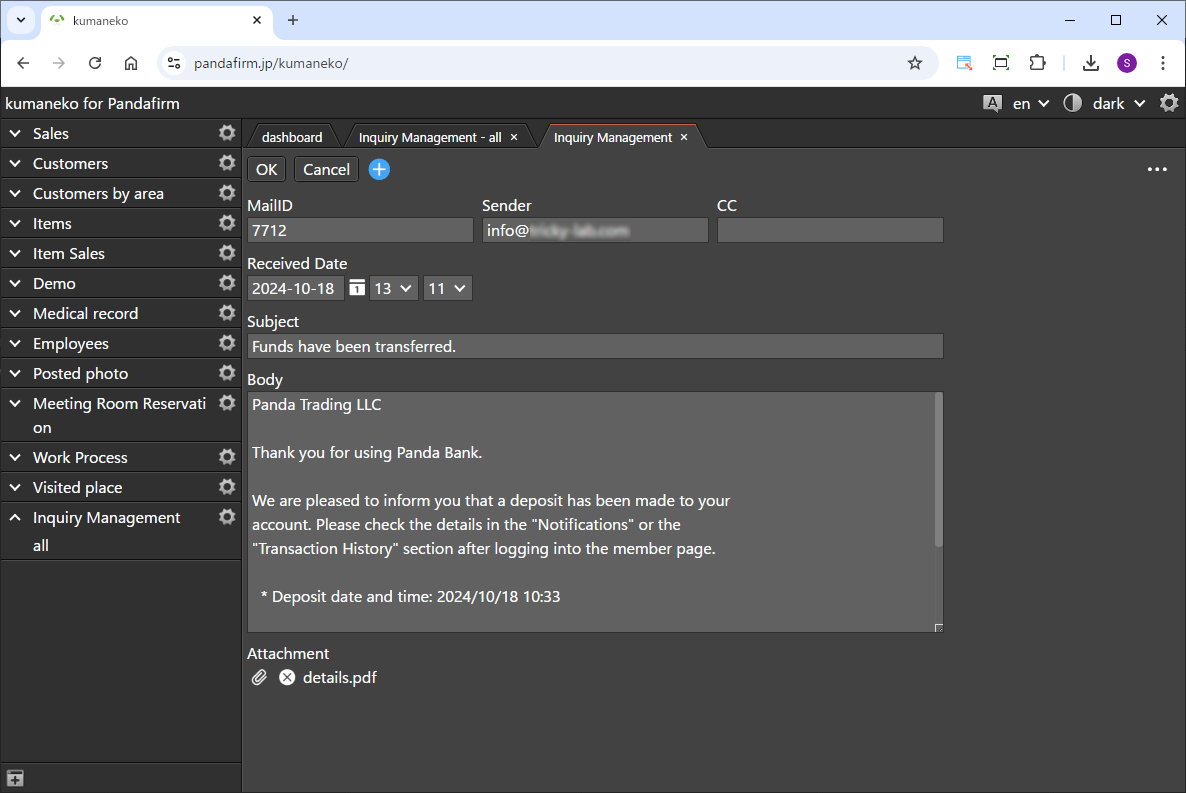
This is a plugin that downloads incoming emails from the specified email account.
It allows you to centralize email management with kumaneko and improve operational efficiency.
 Preparation for using Boost! IMAP (Version upgrade of kumaneko)
To use this plugin, you need kumaneko version 1.7.2 or higher. Please check your current version and update it if necessary.
 Preparation for using Boost! IMAP (Installation of the imap module)
To use this plugin, the PHP imap module is required. Please follow the installation steps below according to your server environment.
-
Unix-based Servers
-
Update system packages
Make sure your system packages are up to date.
sudo apt-get update -
Install the imap module
sudo apt-get install php-imapFor CentOS/Red Hat:
sudo yum install php-imap -
Enable the imap module
After installation, enable the imap module.
sudo phpenmod imap -
Check the PHP configuration file (php.ini)
Verify that the following line exists in the PHP configuration file (usually located in /etc/php/7.x/apache2/php.ini or /etc/php/7.x/fpm/php.ini).
extension=imap -
Restart the web server
For Apache:
sudo systemctl restart apache2For nginx:
sudo systemctl restart php7.x-fpm
sudo systemctl restart nginx
-
-
Windows-based Servers
-
Edit the php.ini file
Open the php.ini file in the PHP installation directory using a text editor.
-
Enable the imap module
Find and uncomment the following line (remove the semicolon at the beginning).
;extension=php_imap.dll -
Verify the extension_dir setting
In php.ini, check that the extension_dir is correctly set.
extension_dir = "ext" -
Check for required libraries
Make sure that libeay32.dll and ssleay32.dll (from OpenSSL) are present, as the php_imap.dll depends on them.
-
Restart the server
Save the changes and restart your web server (e.g., Apache or IIS).
-
 Setting up the "Boost! IMAP"
The "Boost! Plugin" is configured and downloaded via the "Boost! Console", so if you haven't set up your "Boost! Console" yet, please register your user information first.
-
Creating a List View
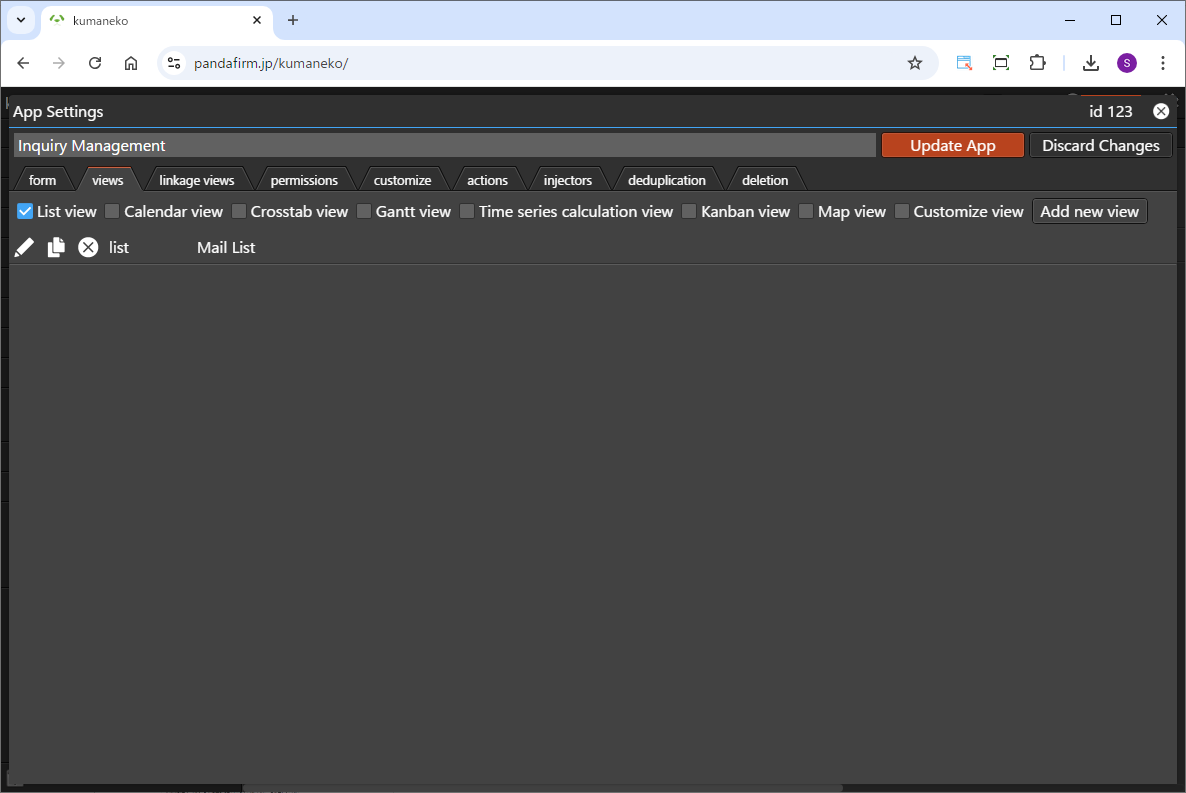
A read-only list view needs to be created in advance for this plugin, so if you want to use a view other than the "all" view, please create a new one.
-
Configuring the "Boost! IMAP"
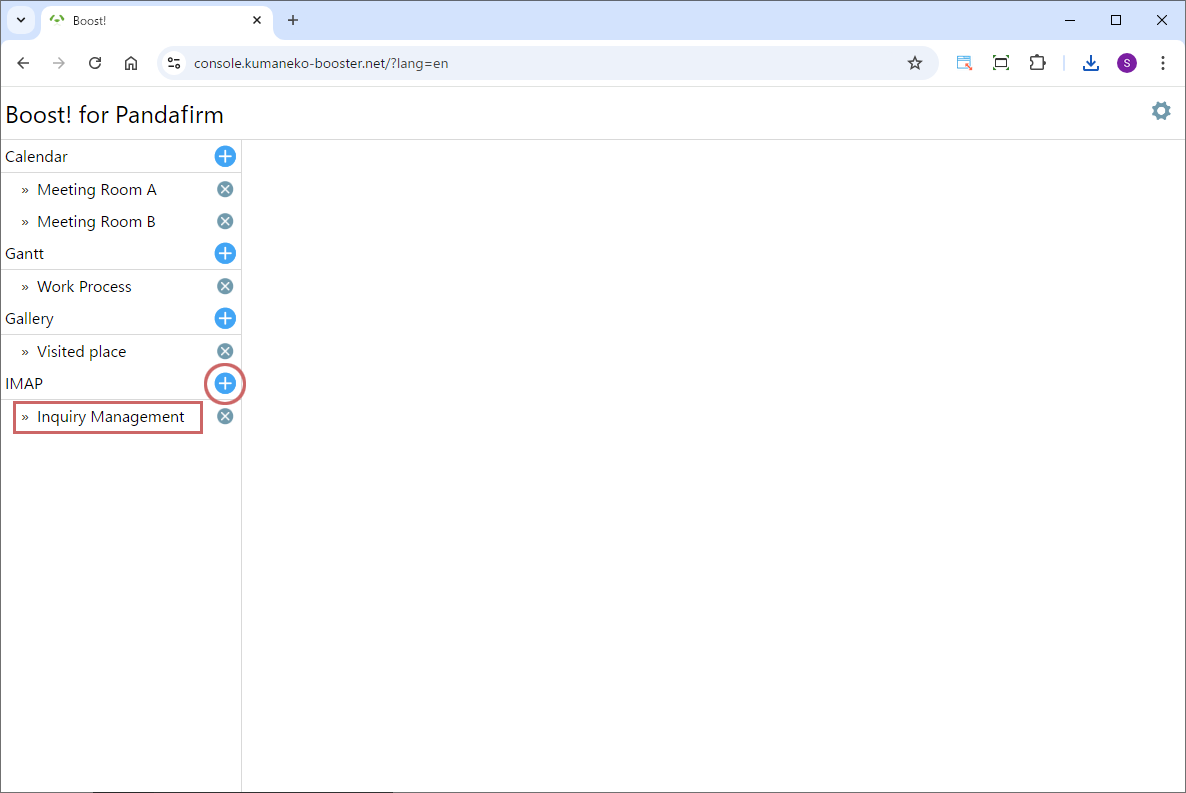
To add a new setting, click the add button on the right (circle in red), and to edit an existing setting, click the setting name (square in red).
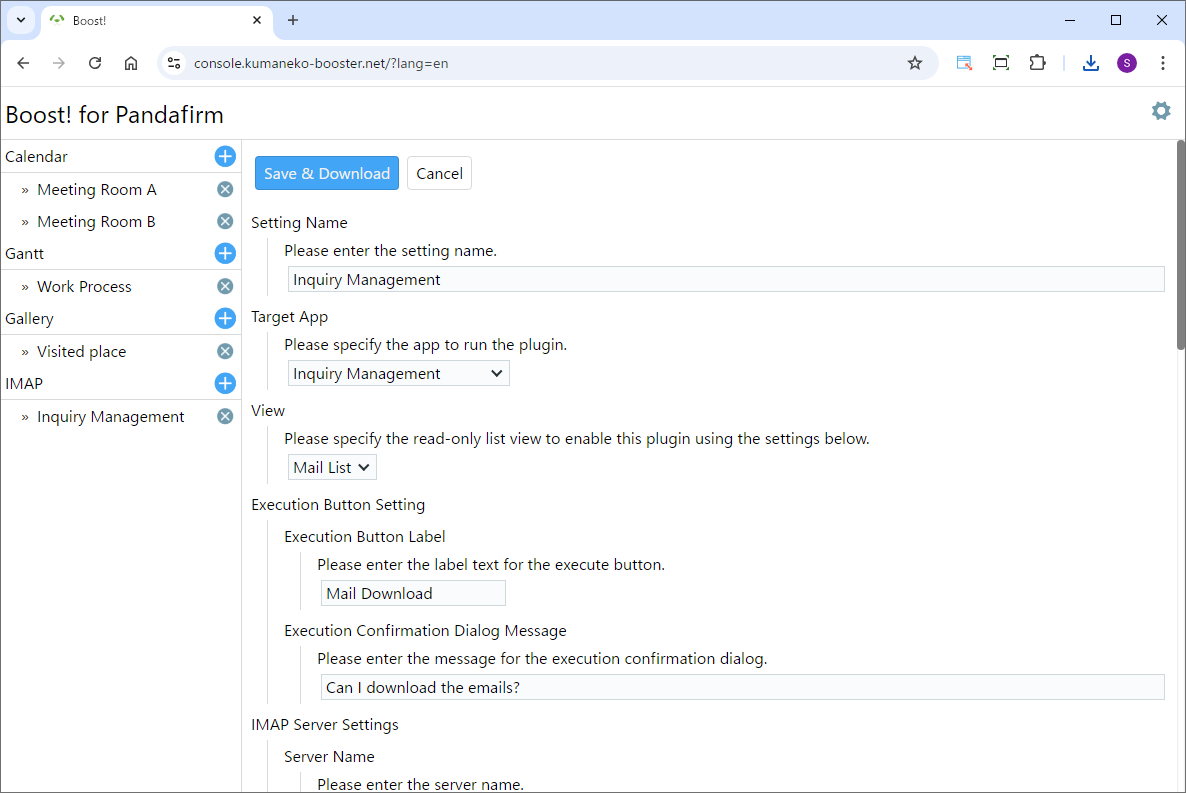
Once the plugin configuration screen appears, specify the setting items.
Setting Name:
Please enter a name that will appear on the list on the left side of the screen and will also be the name of the program to download.
Target App:
Please specify the app to run the plugin.
View:
Please specify the list view that is the target of this setting.
Execution Button Label:
Please enter the label text for the execute button.
Execution Confirmation Dialog Message:
Please enter the message for the execution confirmation dialog.
Server Name:
Enter the hostname of the IMAP server. This specifies the location of the server where the emails will be downloaded from.
Port:
Enter the port number used to connect to the IMAP server. Typically, port 993 is used for SSL connections.
Connection Options:
Enter the specific directory path needed to connect to the IMAP server. For example, /imap/ssl. This may vary depending on the server's security settings or protocol.
Mailbox Name:
Enter the name of the mailbox on the IMAP server. Typically, INBOX is used, but other folders can also be specified.
User Name:
Enter the username to connect to the IMAP server. This will be the login name for the email account you wish to access.
Password:
Enter the password to connect to the IMAP server. This password is required to access the specified email account.
UID:
Please specify the field to save the mail ID.
Sender:
Please specify the field to save the sender.
CC:
Please specify the field to save the CC.
Received DateTime:
Please specify the field to save the received date and time.
Subject:
Please specify the field to save the subject.
Body:
Please specify the field to save the body.
Attachment Field:
Please specify the field to save the attachment.
For information on downloading the program or installing it to kumaneko, please check the page for setting up the "Boost! Console".
 "Boost! IMAP" Operation Method
-
How to Operate
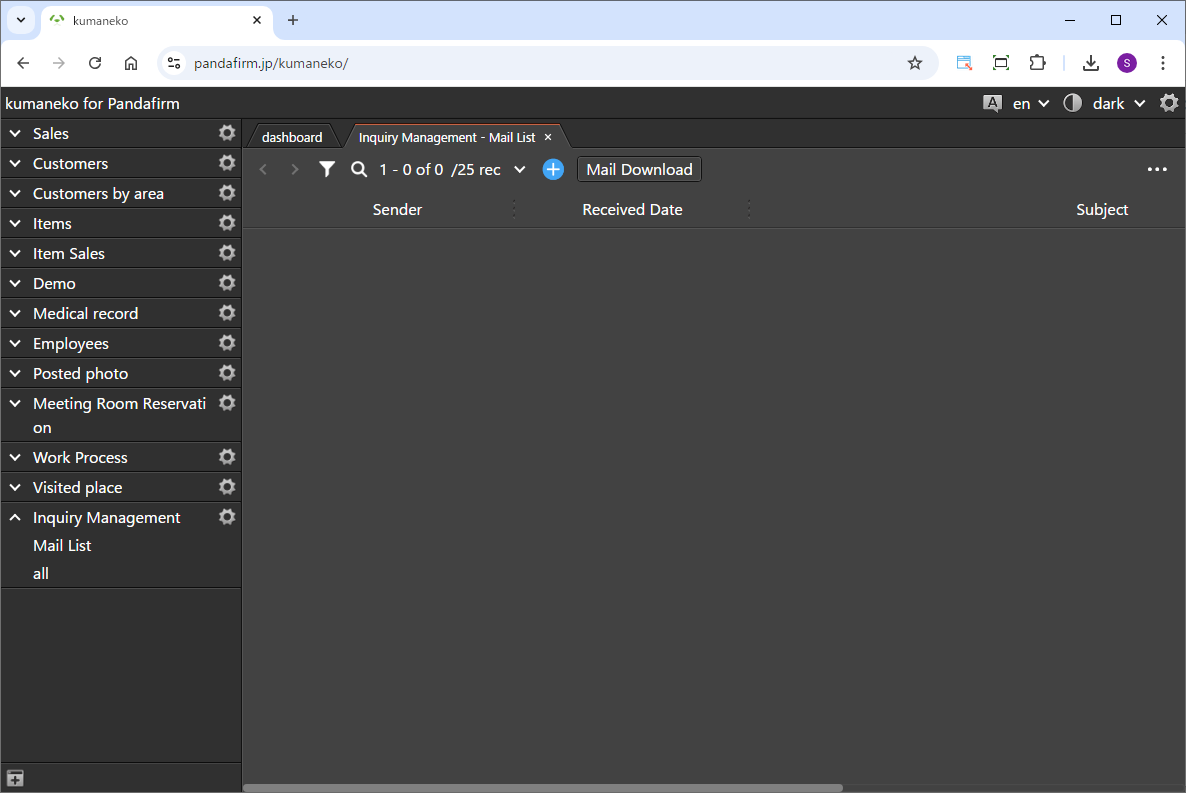
When you display the list view specified in the settings screen, the download execution button will appear.
-
Operation
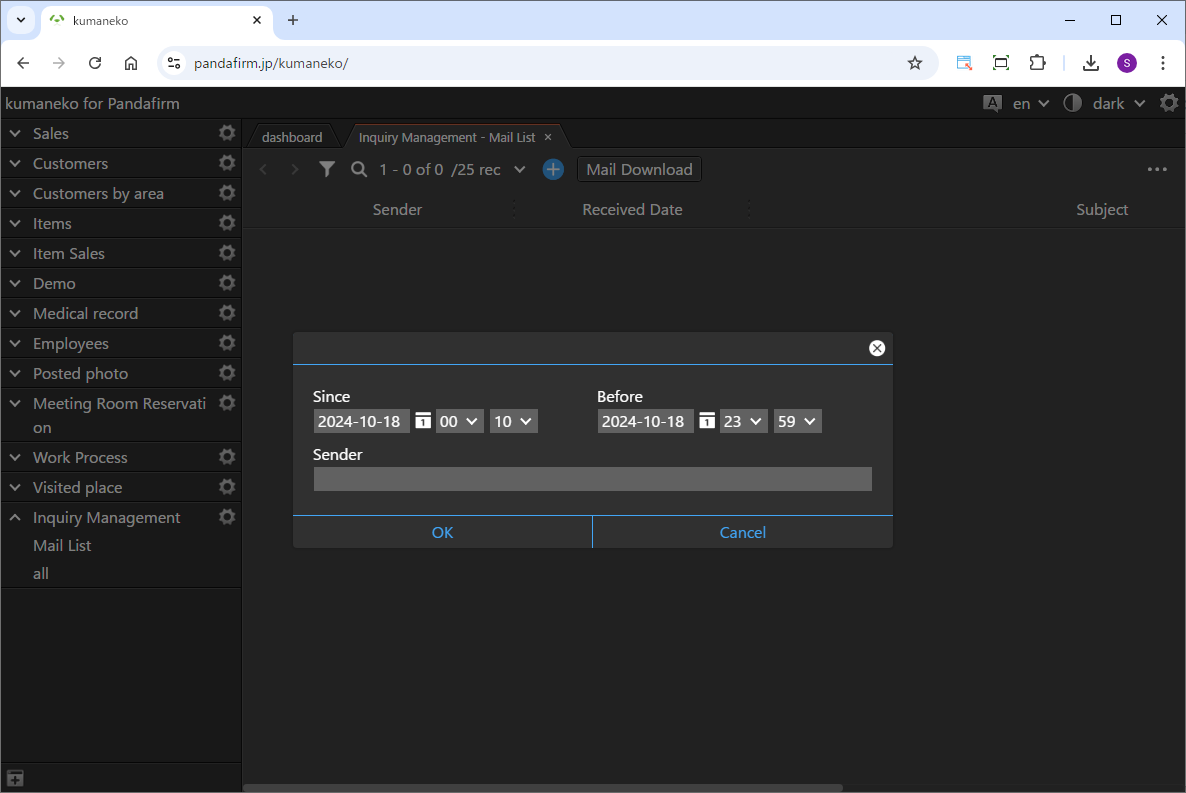
When you click the displayed button, a screen will appear for entering the target period and sender. If you want to filter the emails by sender, enter the sender's email address.
Specifying the sender is optional, so if you want to download all emails within the specified period, leave it blank.
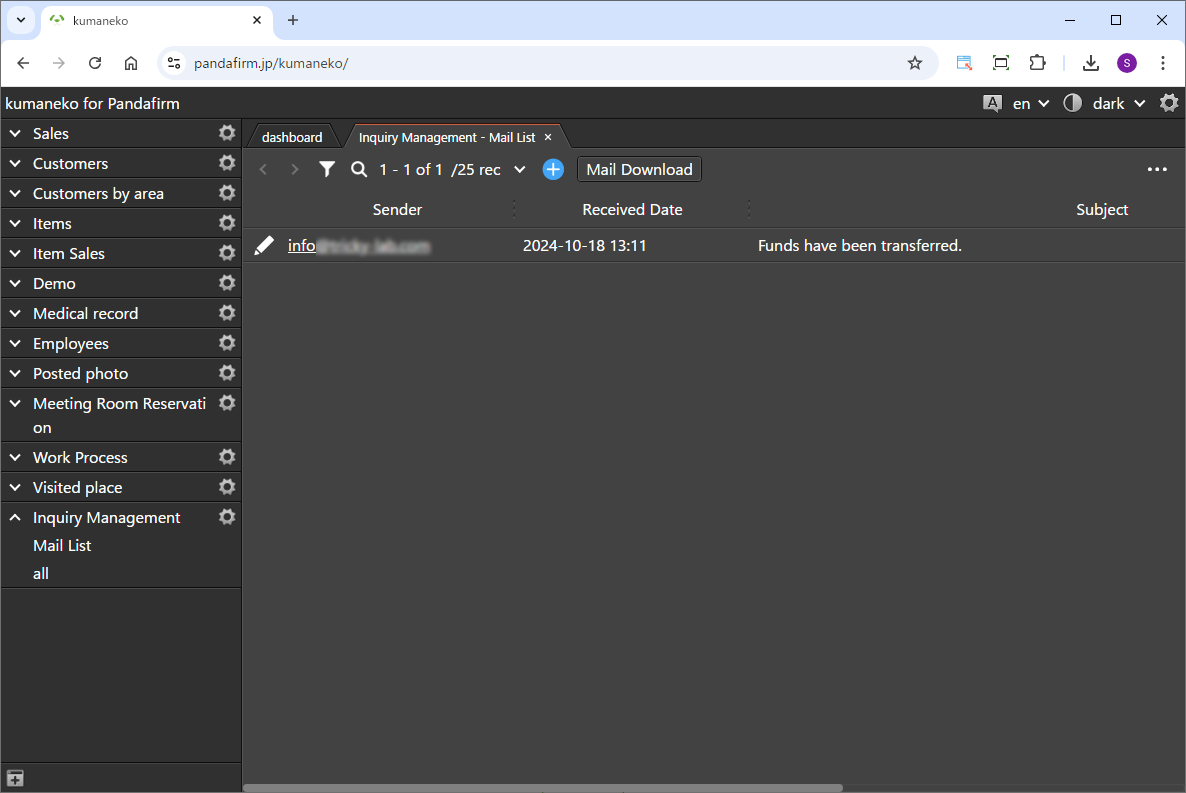
Click the OK button to download the emails.