

This is a plugin that generates form records by retrieving data for a specified period from other apps based on a client master.
By consolidating detail data registered across multiple apps and transferring them together, you can generate invoices, payment instructions, and other reports in bulk. You can also configure flexible report creation logic, including the mapping between transfer sources and destinations, sorting, and reflecting previous amounts.
 Preparation for using Boost! Fusion (Version upgrade of kumaneko)
To use this plugin, you need kumaneko version 2.0.1 or higher. Please check your current version and update it if necessary.
Setting up the "Boost! Fusion"
The "Boost! Plugin" is configured and downloaded via the "Boost! Console", so if you haven't set up your "Boost! Console" yet, please register your user information first.
-
Placement and Verification of Fields for Report Generation
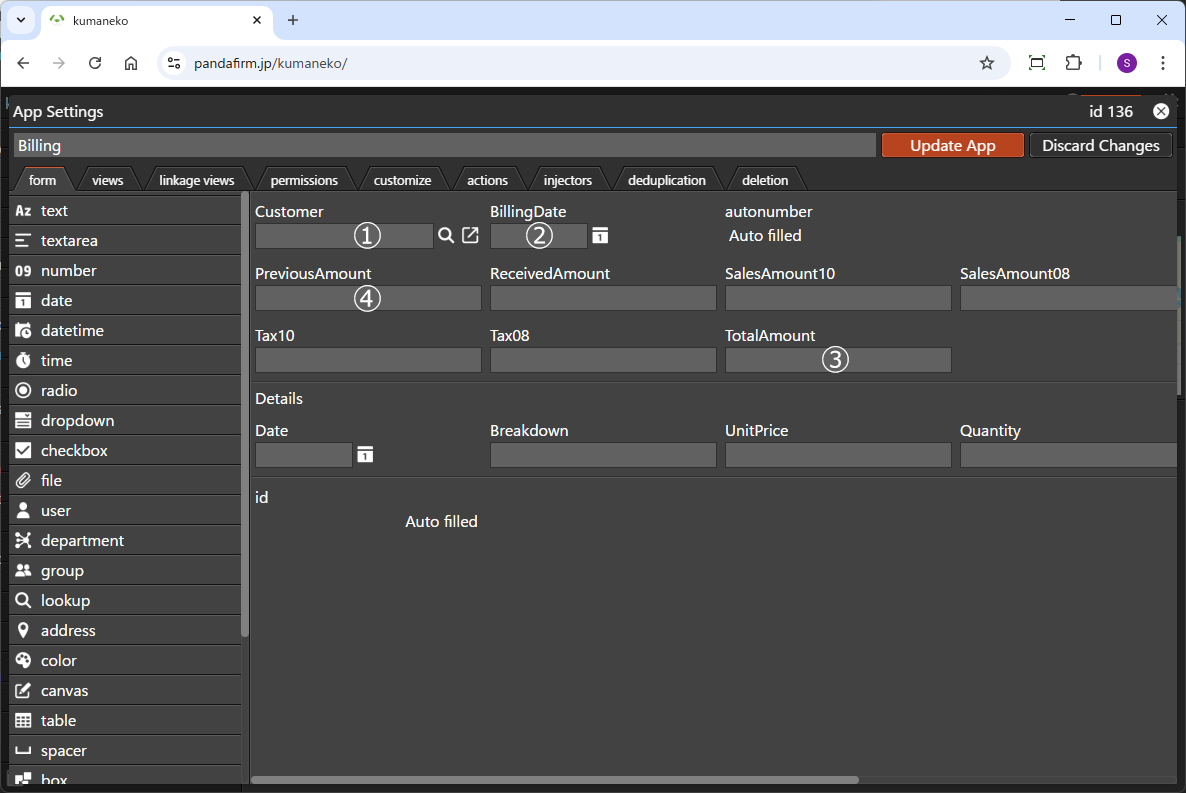
First, the app where this plugin is installed requires several fields to store the data.
1. Client Field A field that refers to the client for whom the report is issued.
Only Lookup fields are supported.2. Issue Date Field A field to store the issue date of the report.
Please configure one Date field.3. Total Amount Field A field that stores the total amount generated by this report.
Please configure one Number field.4. Previous Amount Field A field to store the most recently issued total amount.
Please configure one Number field.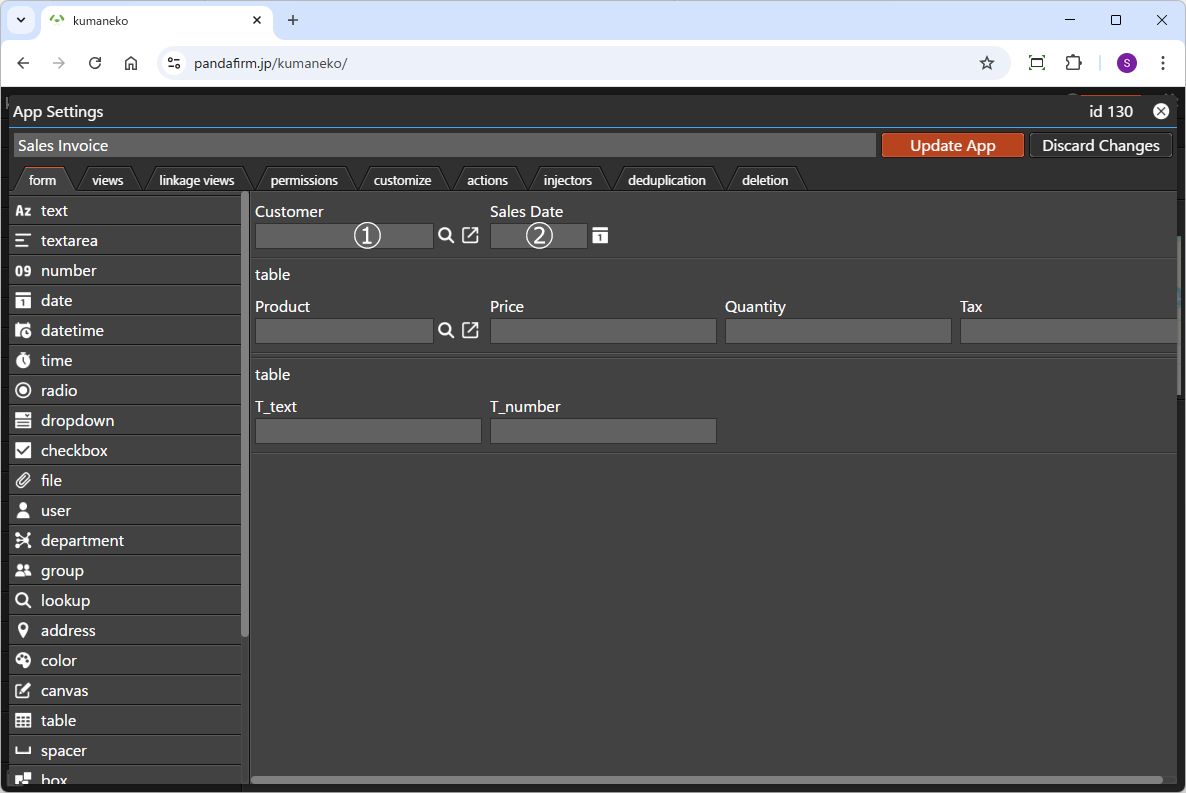
Next, we will explain the fields that need to be placed in the “transfer source app,” which serves as the basis for the report details.
1. Client Field A key field used to link with the client field in the target app.
It must hold the same value as the client field in the report app.2. Date Field A field that holds dates such as transaction or occurrence dates, used to determine whether the data falls within the target period.
Records or table rows that match the “Issue Date” specified when generating the report will be included in the transfer. -
Creating a List View
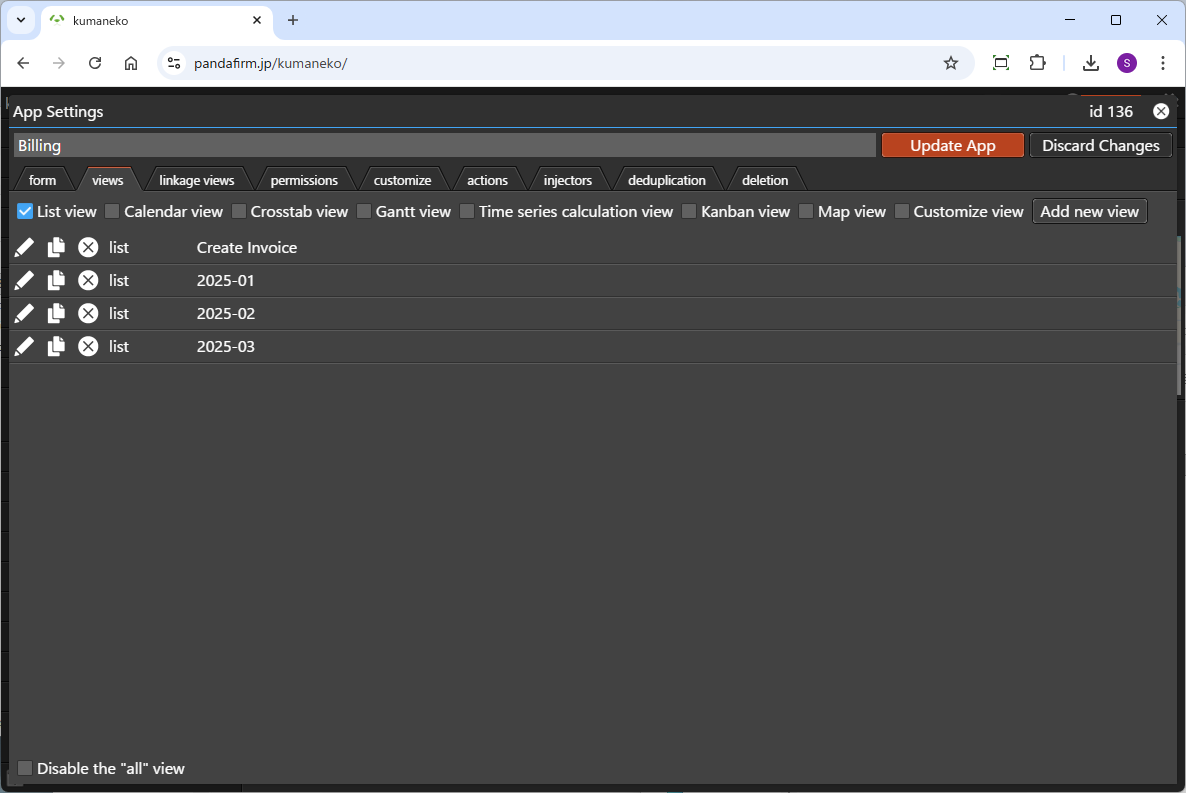
A read-only list view needs to be created in advance for this plugin, so if you want to use a view other than the "all" view, please create a new one.
-
Configuring the "Boost! Fusion"
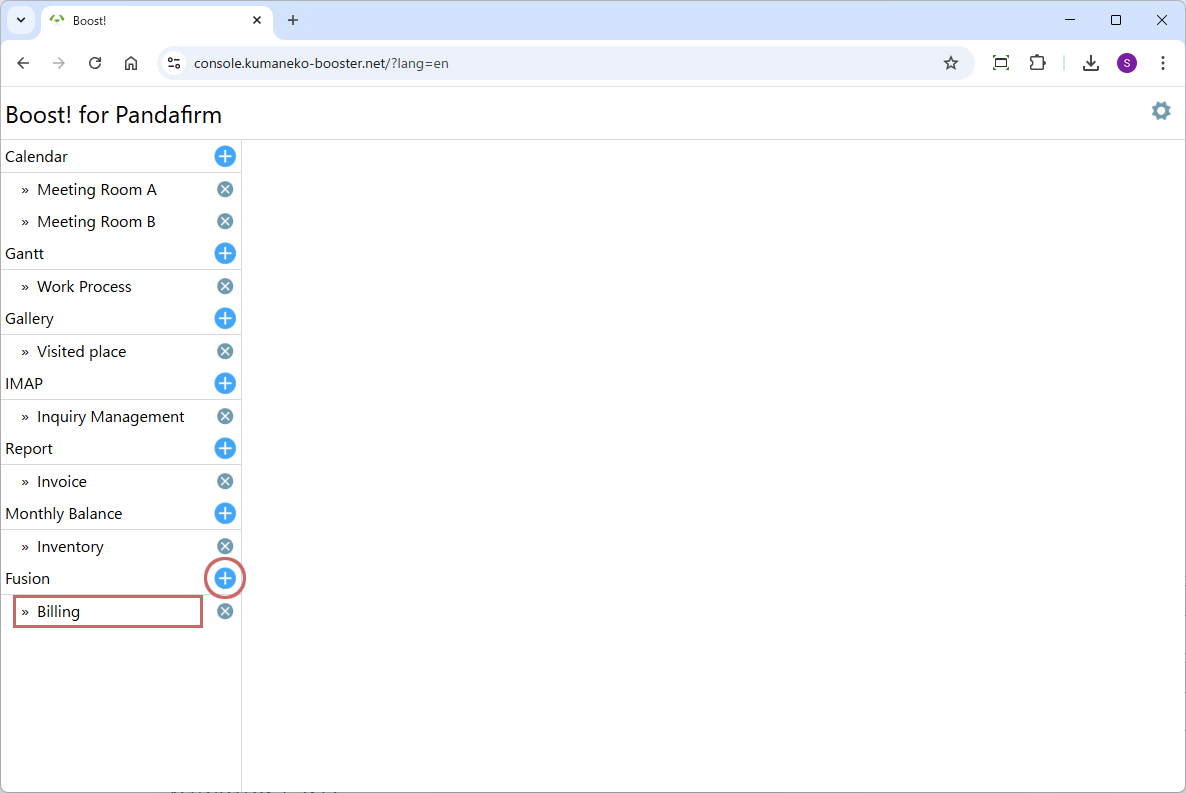
To add a new setting, click the add button on the right (circle in red), and to edit an existing setting, click the setting name (square in red).
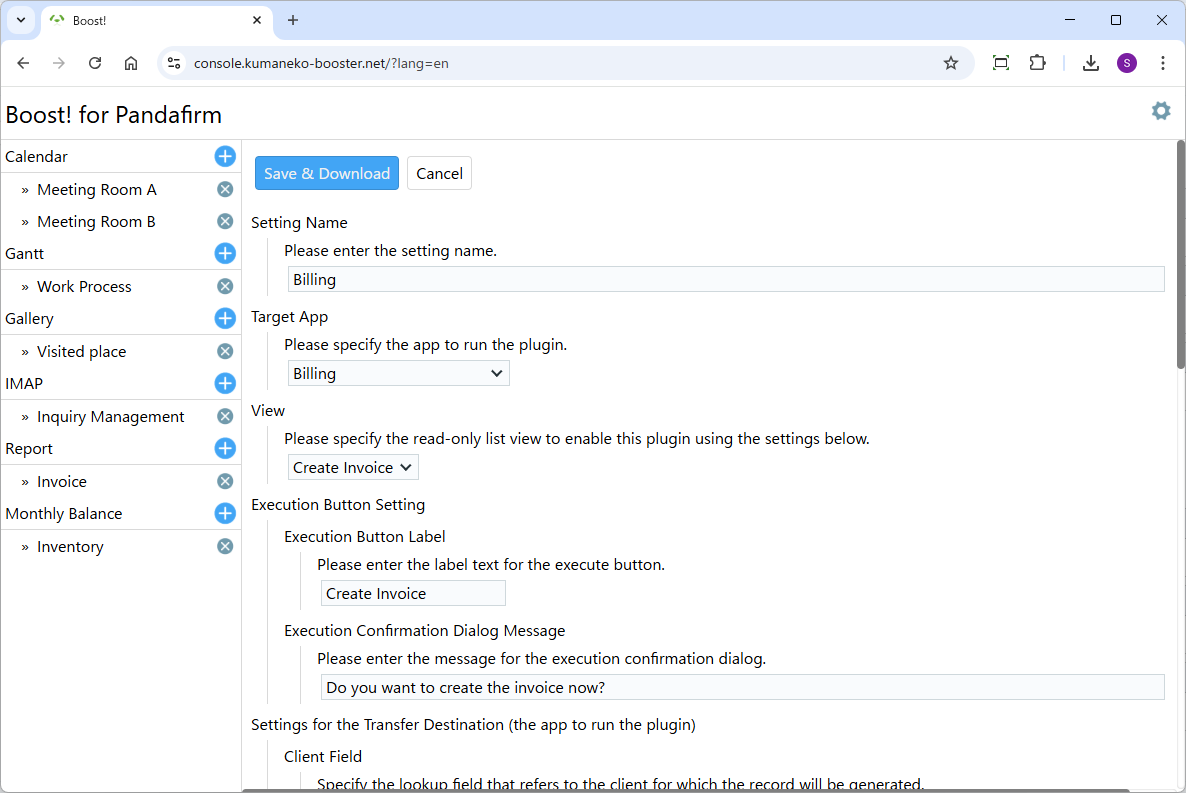
Once the plugin configuration screen appears, specify the setting items.
Setting Name:
Please enter a name that will appear on the list on the left side of the screen and will also be the name of the program to download.
Target App:
Please specify the app to run the plugin.
View:
Please specify the list view that is the target of this setting.
Execution Button Label:
Please enter the label text for the execute button.
Execution Confirmation Dialog Message:
Please enter the message for the execution confirmation dialog.
Client Field:
Please specify the lookup field that refers to the client for which the report will be generated.
Client Group Field:
Please specify the field used to group and filter clients, such as “10th cutoff” or “end-of-month”, which exists in the app referred to by the client field (i.e., the client master app).
The data from this field will be displayed as a dropdown in the list view header, alongside the issue date calendar icon, and will be used when the plugin is executed.
Issue Date Field:
Please specify the date field to be used as the issue date for the report.
For invoices, this would be the "Invoice Date", and for payment instructions, the "Planned Payment Date".Total Amount Field:
Please specify the number field that stores the total amount generated in the current report.
This value will be set as the “Previous Amount” in the next generated report.Previous Amount Field:
Please specify the number field to store the previous amount.
Based on the client and issue date, the total amount from the most recently created report record will be set in this field.Settings for the Transfer Source (the app where the source data for the report details is stored):
Please specify the app that holds the data for the report details, and configure the transfer destination table and transfer fields.
Sort Report Details:
If you want to sort the report details after the transfer from the transfer source app is complete, please configure the sort settings here.
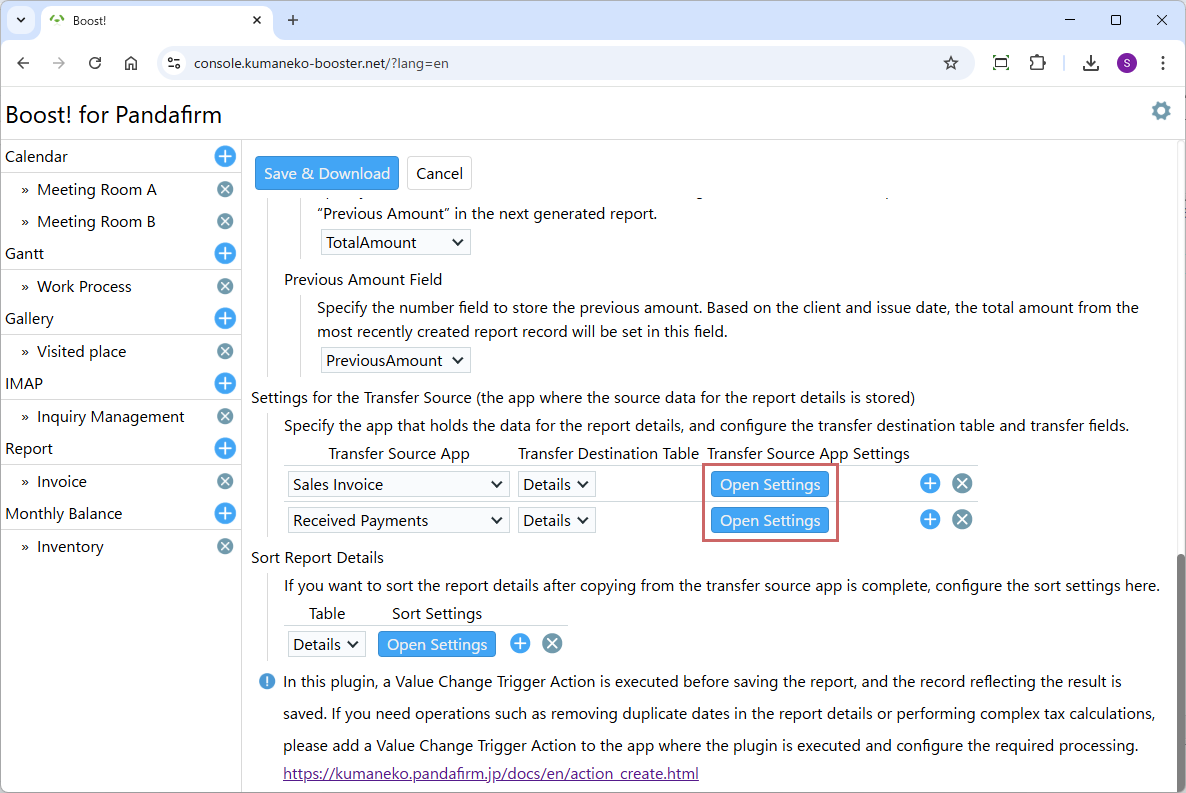
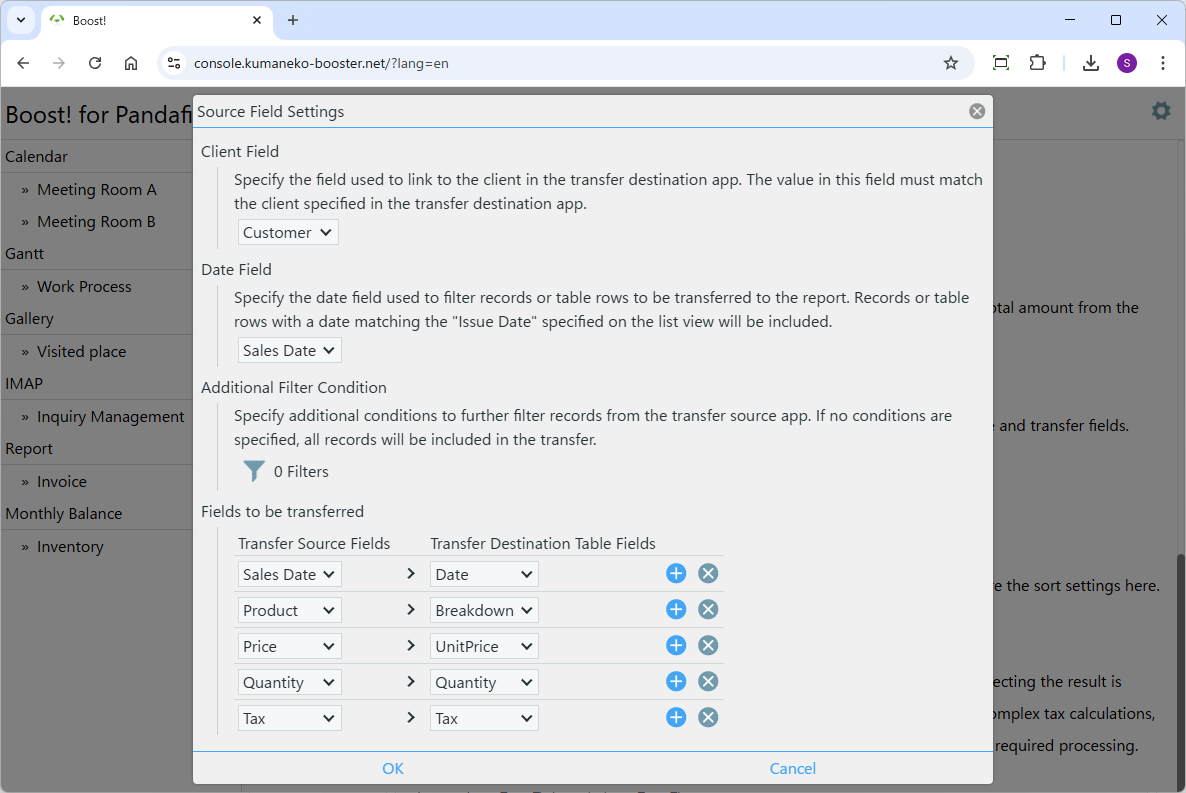
The settings for the source app are configured from the popup screen that appears when you click the "Open Settings" button.
Client Field:
Please specify the field used to link to the client in the transfer destination app.
The value in this field must match the client specified in the transfer destination app.Additional Filter Condition:
Optionally, please specify additional conditions to further filter records from the transfer source app.
Date Field:
Please specify the date field used to filter records or table rows to be transferred to the report.
Records or table rows with a date matching the "Issue Date" specified on the list view will be included.Fields to be transferred:
Please specify the corresponding fields between the transfer source and destination.
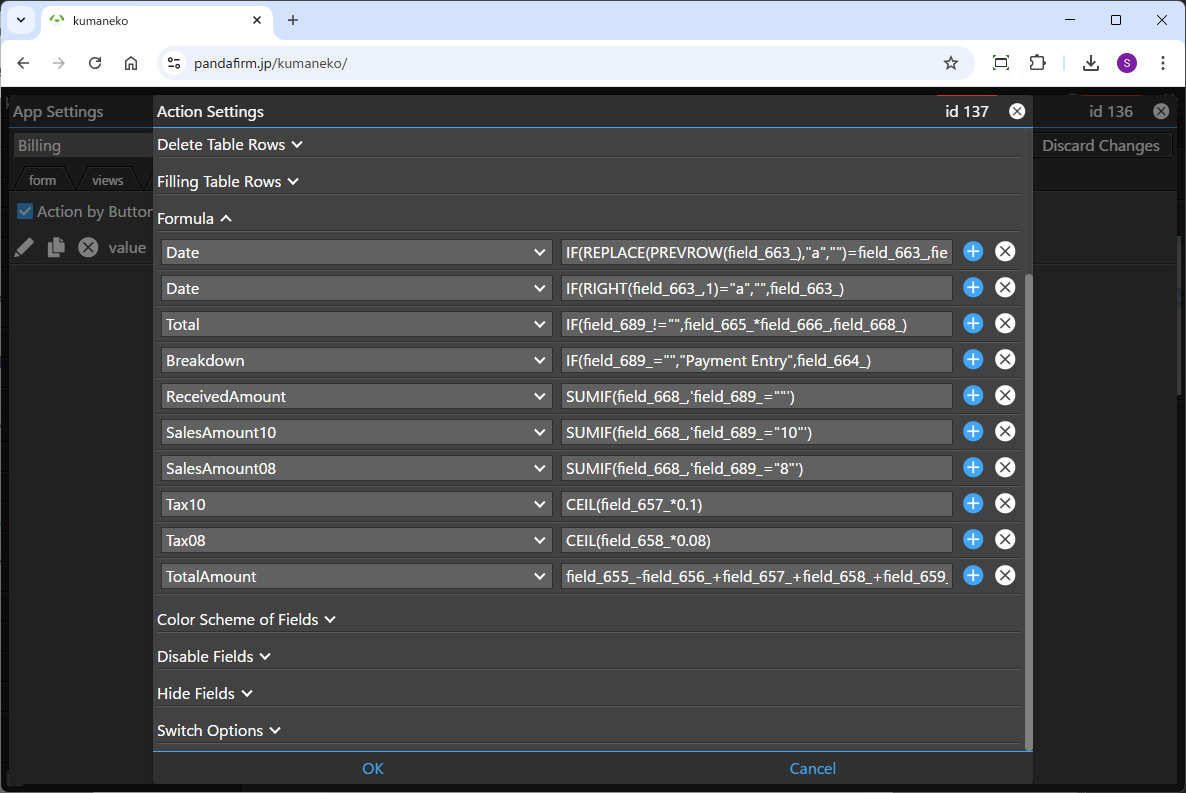
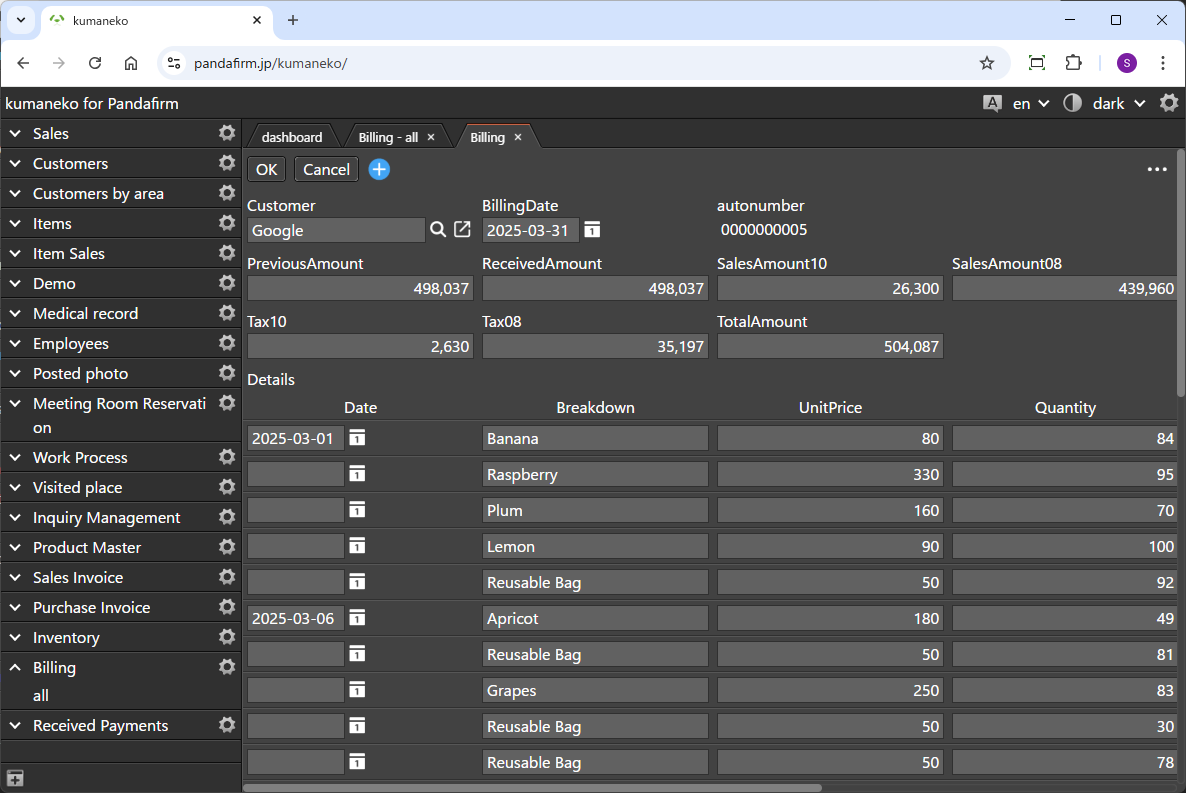
Before the record is saved, a Value Change Trigger Action is executed after the transfer is completed, allowing automatic calculations to be performed according to the purpose of the report.
Below are the formulas used in the sample app along with explanations.Target Field Formula and Explanation Date IF(REPLACE(PREVROW(field_663_),"a","")=field_663_,field_663_+"a",field_663_)
To remove duplicate date displays, if the date is the same as the one in the row above, an “a” is temporarily added to the end of the date.
Date IF(RIGHT(field_663_,1)="a","",field_663_)
Clears values that have an “a” added by the formula above.
Total IF(field_689_!="",field_665_*field_666_,field_668_)
If the Tax field has a value, the result calculated from the unit price and quantity is set; otherwise, the existing value is left unchanged.
Breakdown IF(field_689_="","Payment Entry",field_664_)
In this sample app, the payment-side entries are not mapped to the Breakdown field, so the breakdown is set using this formula.
ReceivedAmount SUMIF(field_668_,'field_689_=""')
Sets the total amount for rows where the Tax value is empty.
SalesAmount10 SUMIF(field_668_,'field_689_="10"')
Sets the total amount for rows where the Tax value is “10.”
SalesAmount08 SUMIF(field_668_,'field_689_="8"')
Sets the total amount for rows where the Tax value is “8.”
Tax10 CEIL(field_657_*0.1)
Calculates the 10% tax amount based on the SalesAmount10 field.
Tax08 CEIL(field_658_*0.08)
Calculates the 8% tax amount based on the SalesAmount08 field.
TotalAmount field_655_-field_656_+field_657_+field_658_+field_659_+field_660_
Sets the total amount calculated from all results above.
For information on downloading the program or installing it to kumaneko, please check the page for setting up the "Boost! Console".
"Boost! Fusion" Operation Method
-
How to Operate

When you open the list view specified in the settings screen, a calendar icon for selecting the issue date will appear, along with a dropdown for filtering the target clients for report creation (if configured) and an execute button.
-
Operation
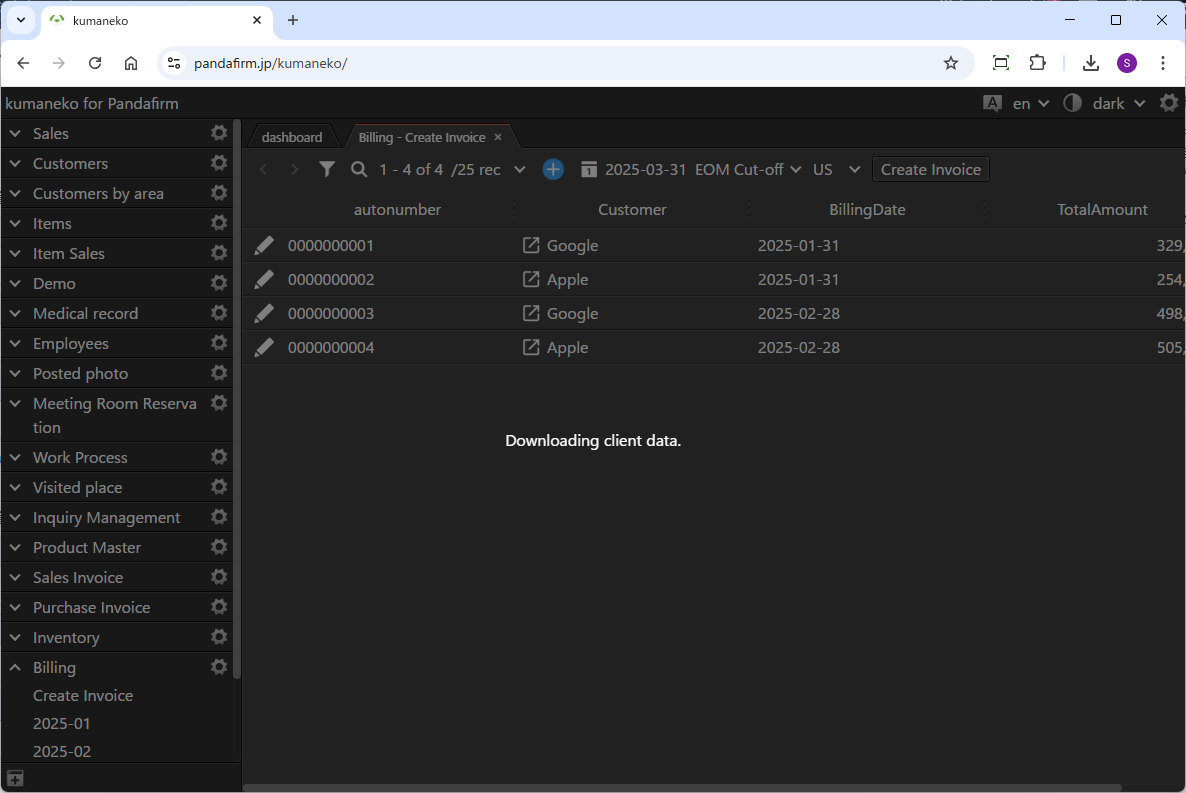
When you click the displayed button, the report will be generated.
In this plugin, a Value Change Trigger Action is executed before saving the report, and the record reflecting the result is saved. If you need operations such as removing duplicate dates in the report details or performing complex tax calculations, please add a Value Change Trigger Action to the app where the plugin is executed and configure the required processing.