
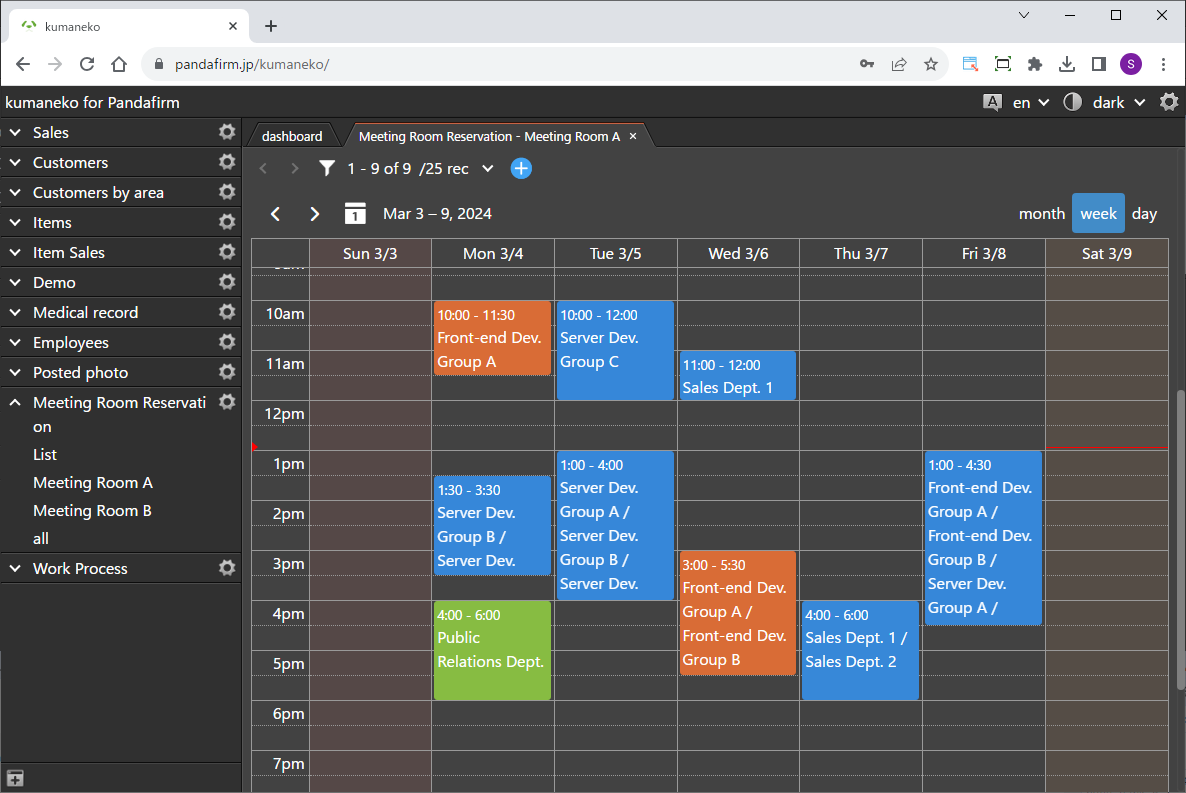
This is a plugin that generates a calendar-style view.
We use the popular JavaScript library called FullCalendar, so the interface should be familiar.
 Setting up the "Boost! Calendar"
The "Boost! Plugin" is configured and downloaded via the "Boost! Console", so if you haven't set up your "Boost! Console" yet, please register your user information first.
-
Creating a Customized View

A customized view needs to be created in advance for this plugin, so you will create a view in customized format.
-
Configuring the "Boost! Calendar"
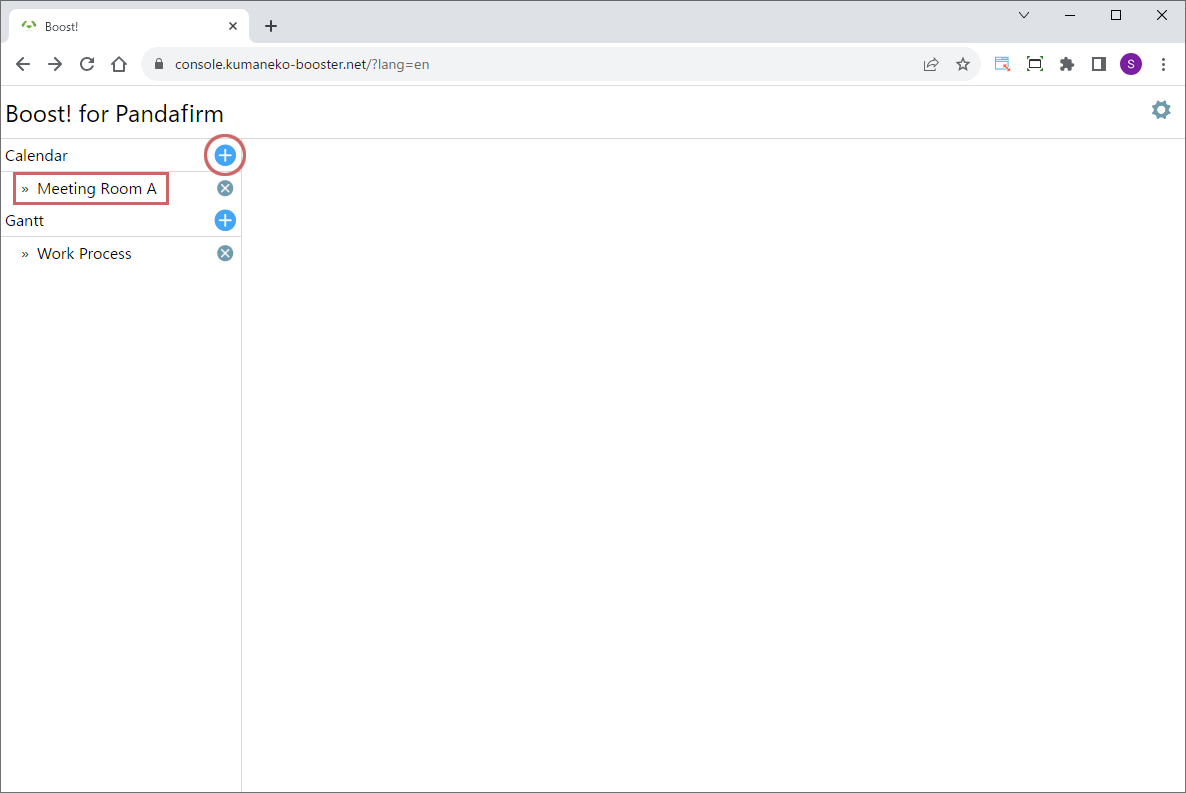
To add a new setting, click the add button on the right (circle in red), and to edit an existing setting, click the setting name (square in red).
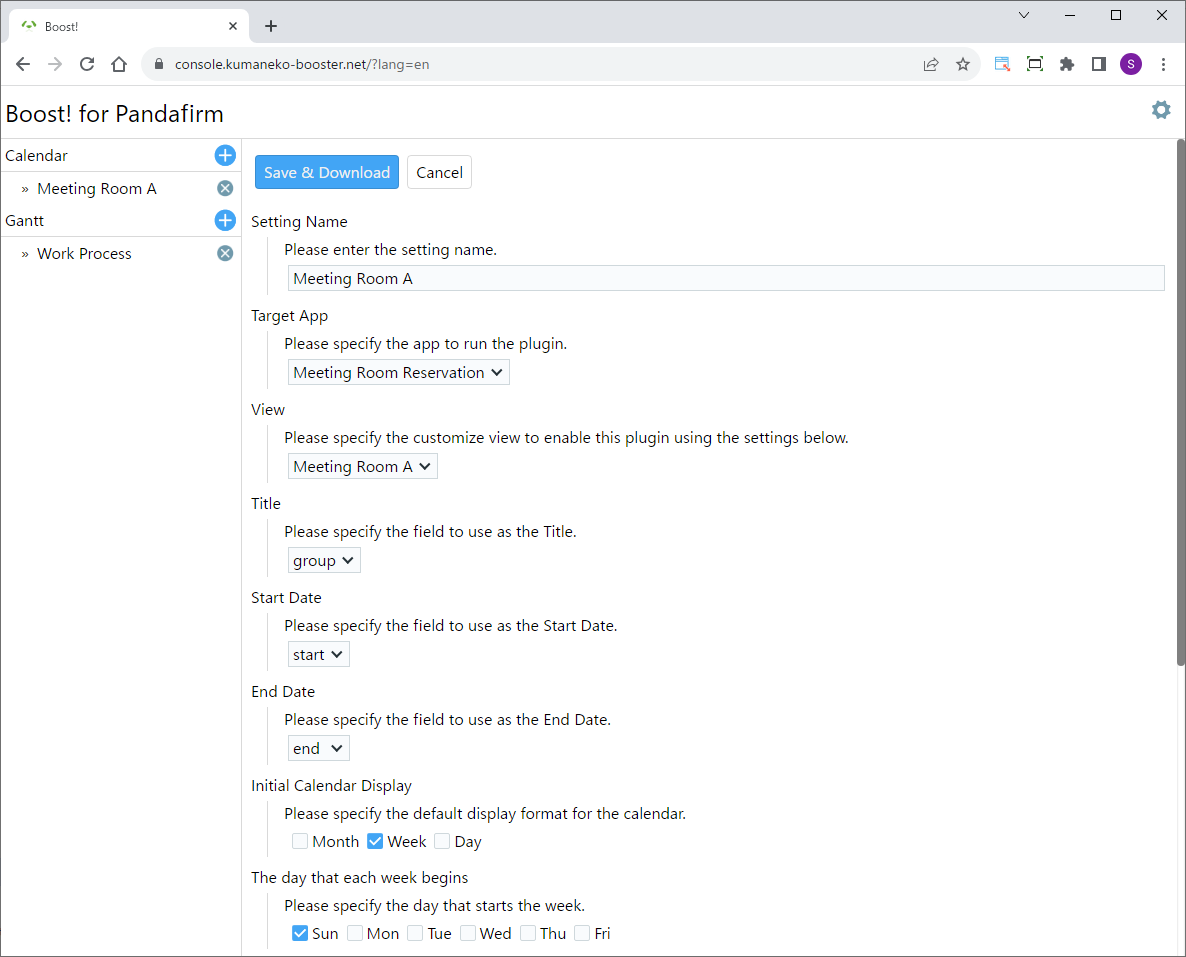
Once the plugin configuration screen appears, specify the setting items.
Setting Name:
Please enter a name that will appear on the list on the left side of the screen and will also be the name of the program to download.
Target App:
Please specify the app to run the plugin.
View:
Please specify the customized view that is the target of this setting.
Title:
Please specify the field to use as the Title.
Start Date:
Please specify the field to use as the Start Date.
End Date:
Please specify the field to use as the End Date.
Initial Calendar Display:
Please specify the default display format for the calendar.
The day that each week begins:
Please specify the day that starts the week.
For information on downloading the program or installing it to kumaneko, please check the page for setting up the "Boost! Console".
"Boost! Calendar" Operation Method
-
How to Operate
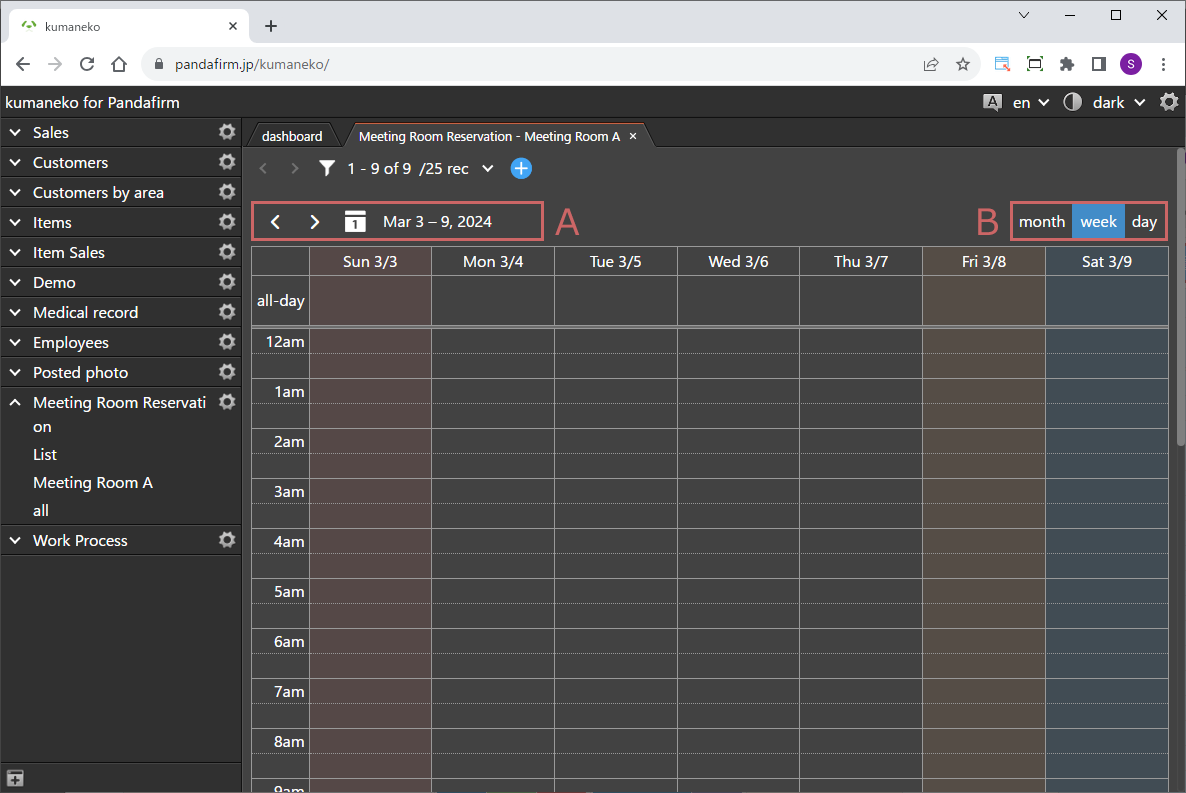
The calendar is displayed when you view it in the customized format specified in the settings screen.
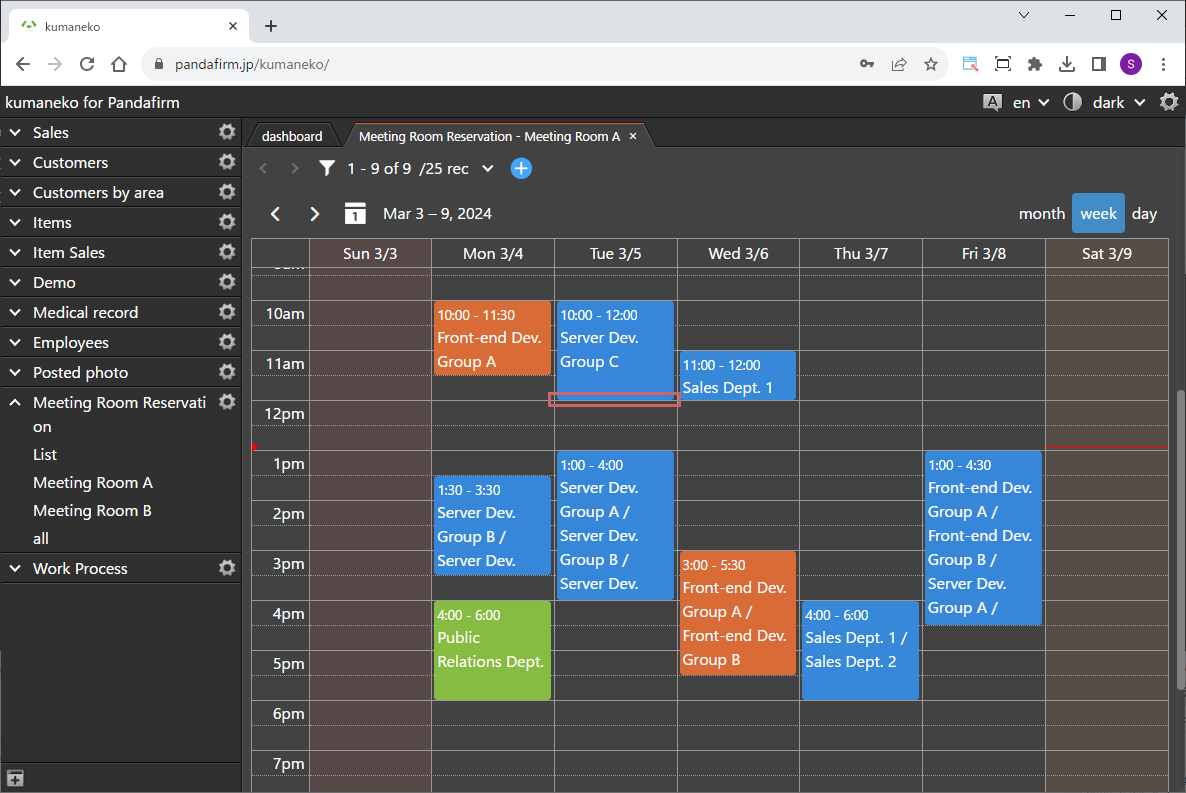
You can switch the displayed date in the A section of the image, and change the calendar view format in the B section.
-
Operation
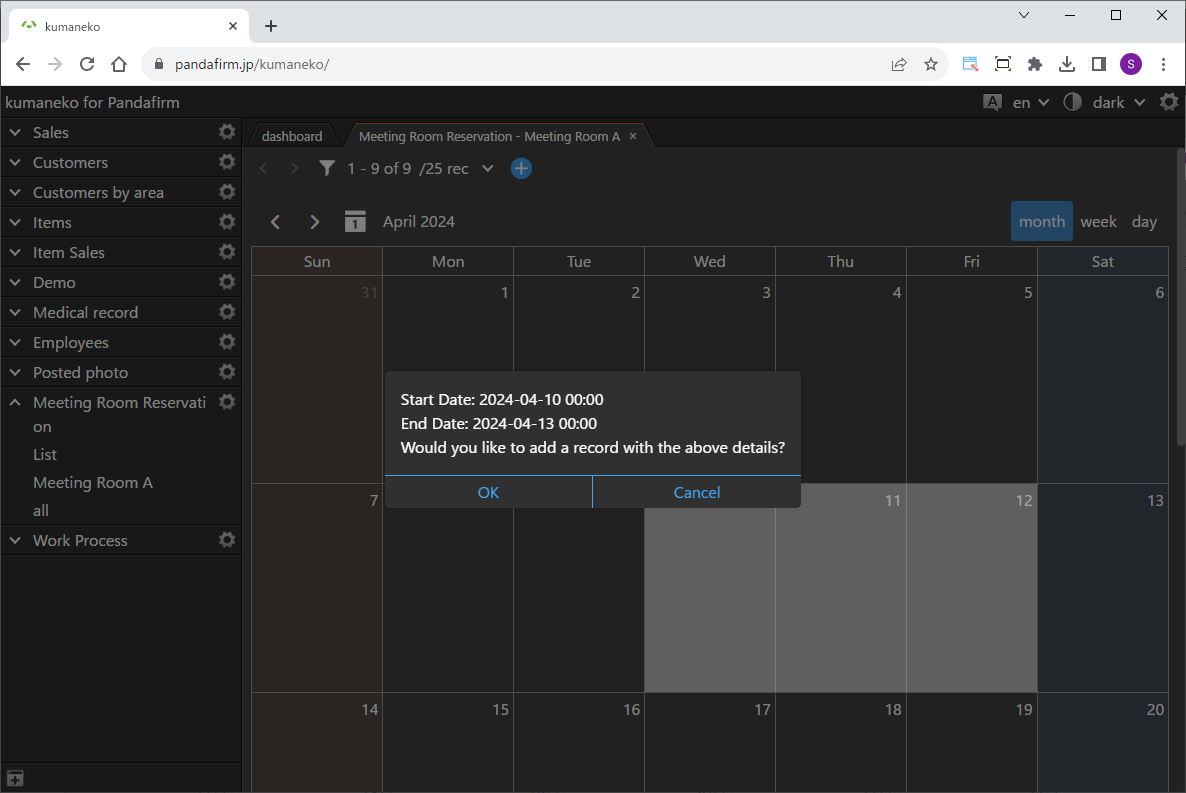
To register a record using the calendar, click on the date you want to register, or drag from the start date to the end date.
This function will be disabled if either the start or end date field is set to an Auto filled field, such as the createdtime or modifiedtime field.
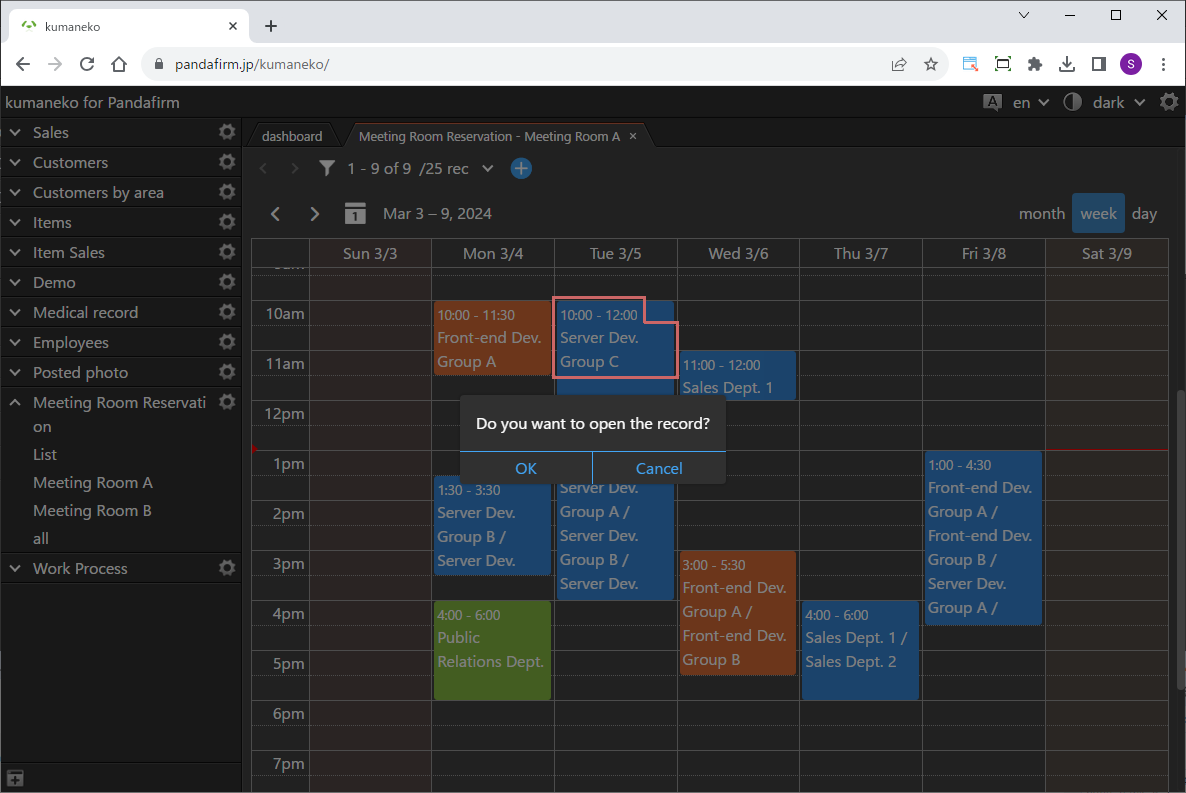
Clicking on the title part of the event area allows you to edit the record.

Dragging the part of the event area other than the title allows you to move the event.
This function will be disabled if either the start or end date field is set to an Auto filled field, such as the createdtime or modifiedtime field.
Placing the cursor on the end of the event area allows you to change the event period.
The available calendar formats depend on the field types specified for the start and end dates.
Start Date End Date Calendar Format Month Week Day All Fields None NG NG NG Date Field Date Field OK OK NG Date Field Datetime Field NG OK OK Datetime Field Date Field NG OK OK Datetime Field Datetime Field NG OK OK Auto filled Field All Fields NG NG NG All Fields Auto filled Field NG NG NG